How I turned my Sewing Room into a YouTube Studio

Turn a Tiny Craft Room into a Home Film Studio
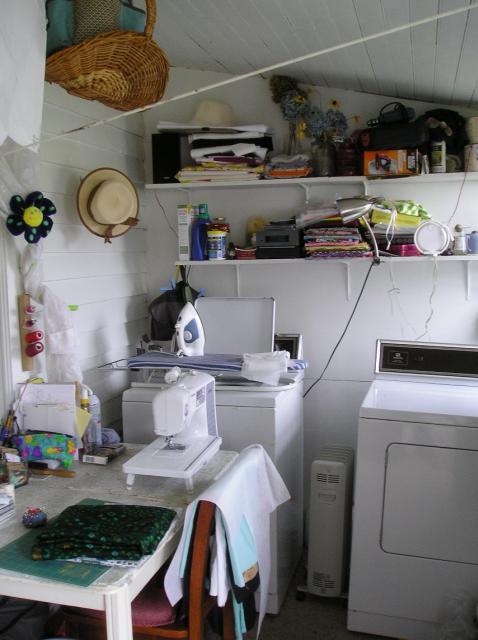
Space, stuff and ugly furniture. I think every crafter has experienced these challenges. Whether you operate out of a basement, a spare bedroom or a backyard shed, it's up to us to claim our space and make it personal. For me, my craft space is a 100-square-foot all-purpose mudroom and laundry area. Space hogs like a full-sized washer and dryer really limit the area along with shoes, boots, coats and all that gear. But the most important part is that the space is mine. I've got my sewing machine, my iron, my stereo, my CD collection (yes, I'm a little old school), laundry facilities and everything I need right here.
Now, I want a little more from my space. I'm obsessively passionate about quilting, sewing, crafting and keeping my hands busy making things. Thanks to Squidoo, I've realized that sharing my passion and teaching others is especially rewarding. So, I'm determined to make a series of sewing and crafting videos for YouTube. But first, I need to clean up my space to make things a bit more presentable and organized for the camera. Here's what I did to quickly transform my humble craft room into a working film studio--without spending much.
**All photos featured here were taken by me.
Messy Craft Room Challenge - Sacagawea! What'a Mess!

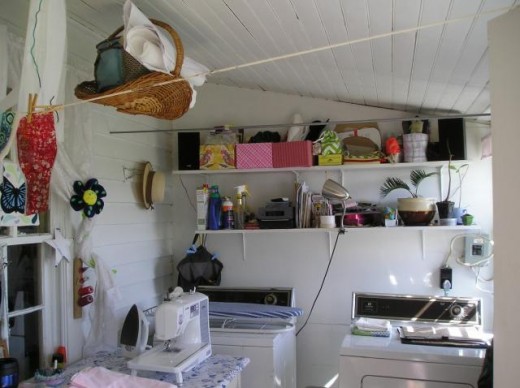
Oy. My craft room has some issues. Where the heck should I start?
The fugly gray contact paper peeling off my table? (Can you see that ugly streak of gluey wood down the middle?)
The fabric spilling off shelves and flooding my table?
The oodles of odds and ends?
The dead and dying plants near the window?
These are just a few of the problems that would become even more apparent on camera. If the lens puts 20 pounds on the body, it would definitely make my room like 20 times uglier.
Other challenges to consider. I'm a renter. I don't own the ugly contact paper table, I can't make any major changes, and I'm on a pretty tight budget. Nothing that I can't overcome!
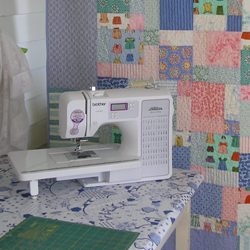
Challenge: Creating a Video Backdrop
Creating a clean and professional backdrop is essential when building a film set. I want all of my videos to show that I am a home crafter and that working in a limited space doesn't have to limit your capabilities. I thought about creating a stark set in another room and moving my stuff in there for filming, but that didn't seem true to my idea, so I decided that I needed to improve the space that I am working with.
The Solution:
Hang one of my quilts to create a personal backdrop that conceals all of the distracting tools and baubles in the real background. I happened to have a heavy metal curtain rod that was long enough to span the seven-foot wide room. I removed the finials, inserted two screws in the wall about seven feet up and hung the quilt with a few metal clips designed for closing bags.
Total Cost: Approximately $30. Since I had quilts and a curtain rod on hand, there was no out-of-pocket expense for this solution. Consider displaying your crafts to create a personal backdrop that showcases your talent. It could be one large item or several smaller decorative pieces.

Challenge: The Table
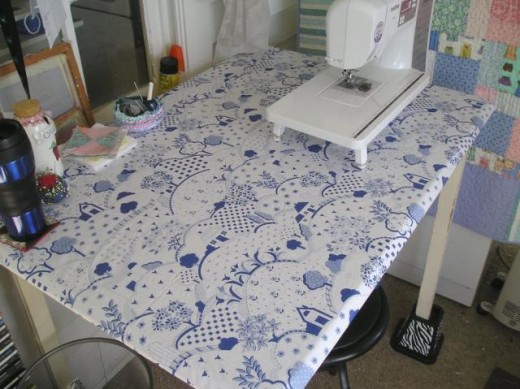
For six long years, (cue blues riff) I hated this table. I just wanted to recover this table. I thought about stripping off the contact paper, painting the top and adding stenciled designs or creating a collage and covering it with Plexiglas, but those options seemed too time-consuming.
The Solution: I decided to cover the ugliness with a flannel-backed vinyl tablecloth that can be wiped clean. It's a temporary fix, and I don't expect it to last forever, but I'm thrilled with the result.
Total Cost: $10 for the table cover plus about 40 minutes to clear off my stuff, wipe down the table and staple the cover on to create a tight, non-shifting surface. Never having to look at the contact paper again = priceless.
Craft Room Makeover Before and After - The Table Before and After
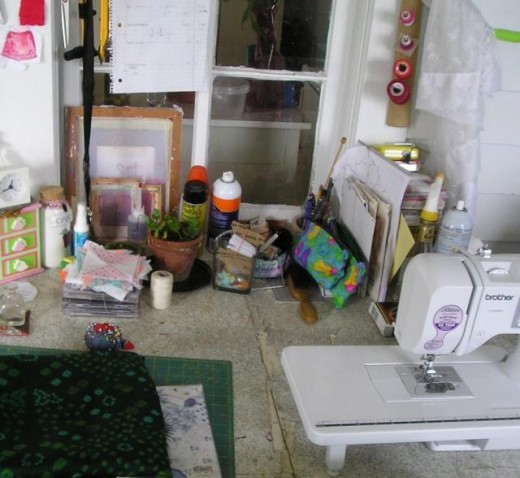
Challenge: Storage

Between fabric and tools, my craft space was simply overrun. What the hay are power sanders, drills and wood stain doing all over my sewing room? It's time for all of this stuff to find a new home.
The Solution:
Move all those saws and tools into another closet where no one has to see them. Remove the airbrush and all that stuff that doesn't get used very often to reclaim some space. The dead plants have since been moved into the garbage.
Controlling my stash meant moving most of my fabric into a dark closet shelf where it won't be exposed to the sun. Batting, rags and stuff that I need on hand was all moved into fabric-covered boxes.
Total Cost: $0 and time spent schlepping boxes into the nether regions of another closet. I opted to cover cardboard boxes with fabric scraps using spray adhesive and tape because I didn't feel like going to the store to get leather or decorative boxes. I think they're about $7 each. Again, this is just a temporary solution for set dressing.

Craft Room Organization - The Shelves

Challenge: The Workspace
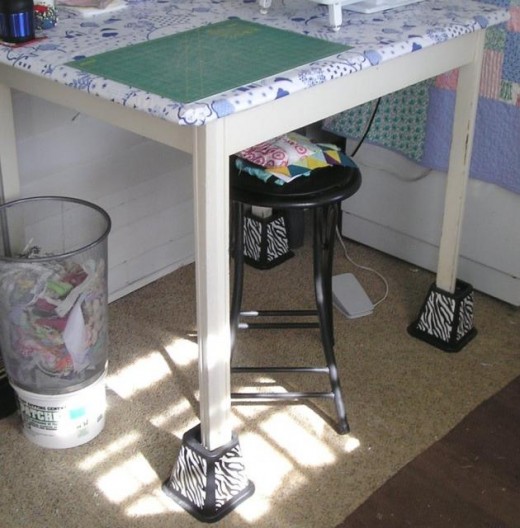
While I was planning this makeover, I stumbled across a great idea for using 5- to 6-inch bed risers to elevate craft tables to a nice counter/work table height. I can't tell you want a difference it makes!
The Solution: Pick up a pair of bed risers. If you're raising your table, just remember that you'll need to raise your chair or get a stool. However, work that you do standing up will be much more comfortable and natural.
Total Cost: Approximately $10 for one set of four bed risers. This is a great and affordable way to make your craft room look and feel professional.

See My Home Film Studio in Action
Learn the basic features and parts of any sewing machine so you can sew with confidence.